Install a new OS on seperated boot sector
1. Create a VHDX
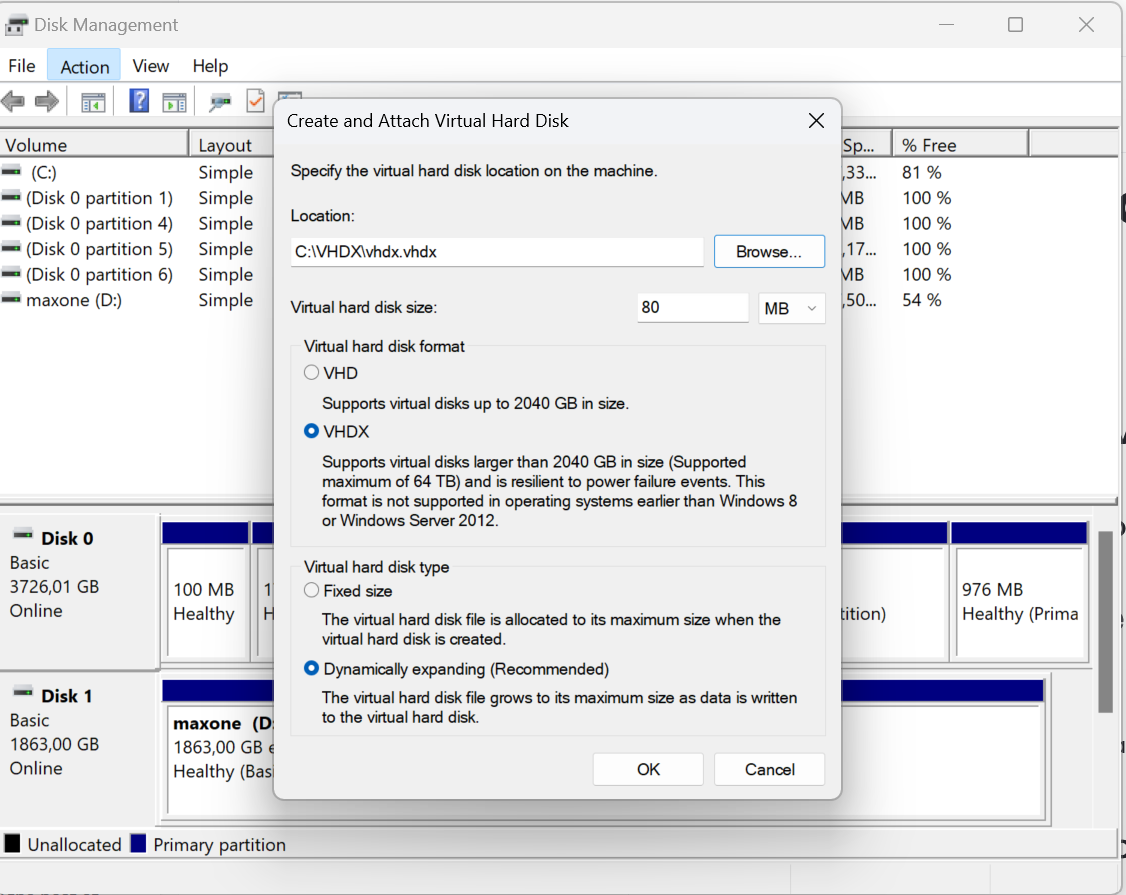
1.1 Attach the VHDX
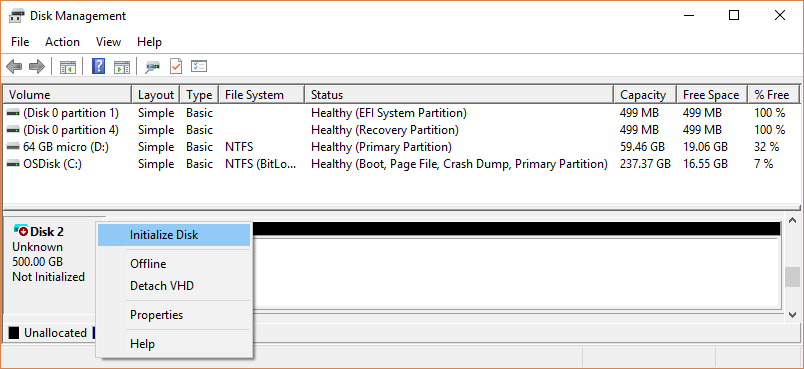
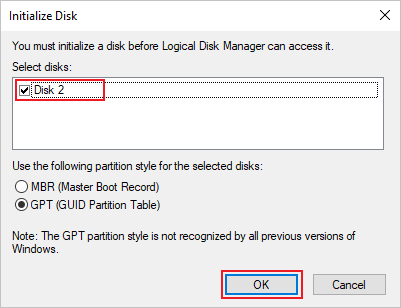
1.2 Initialize the VHDX
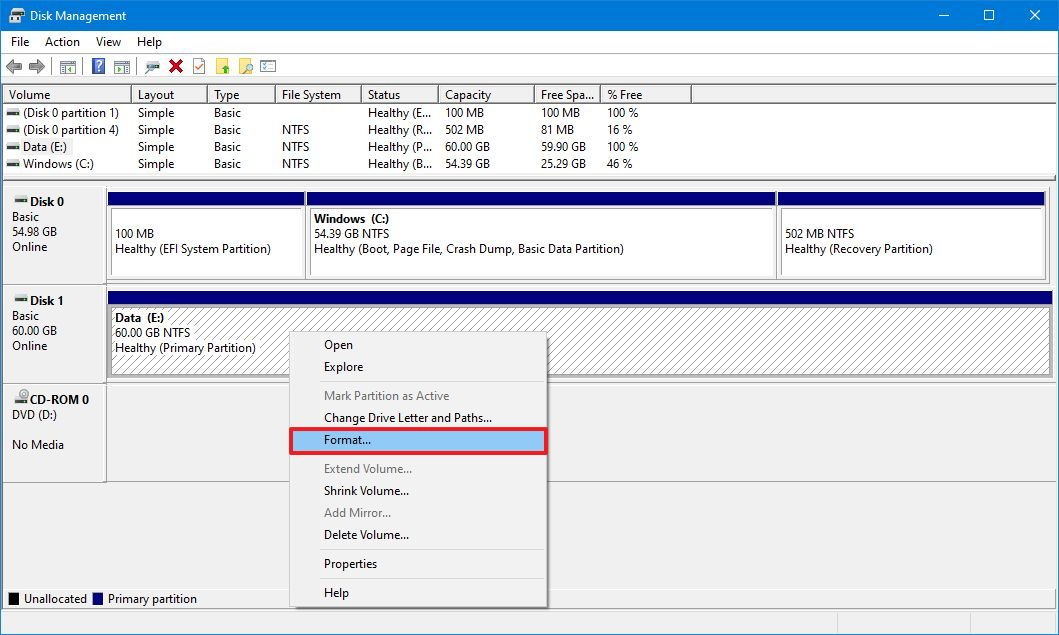
1.3 Format
2. Apply the ISO image to your VHDX
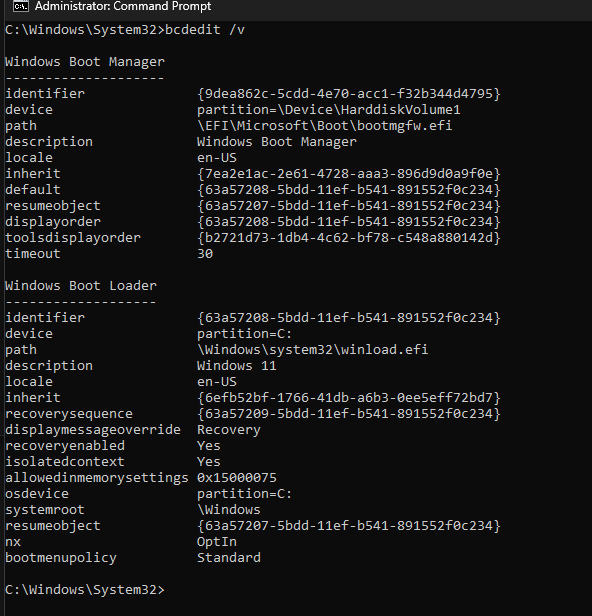
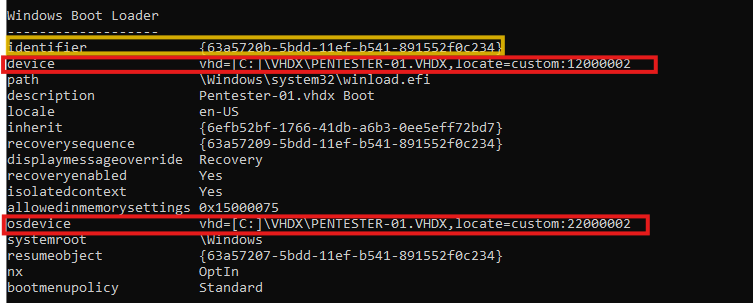
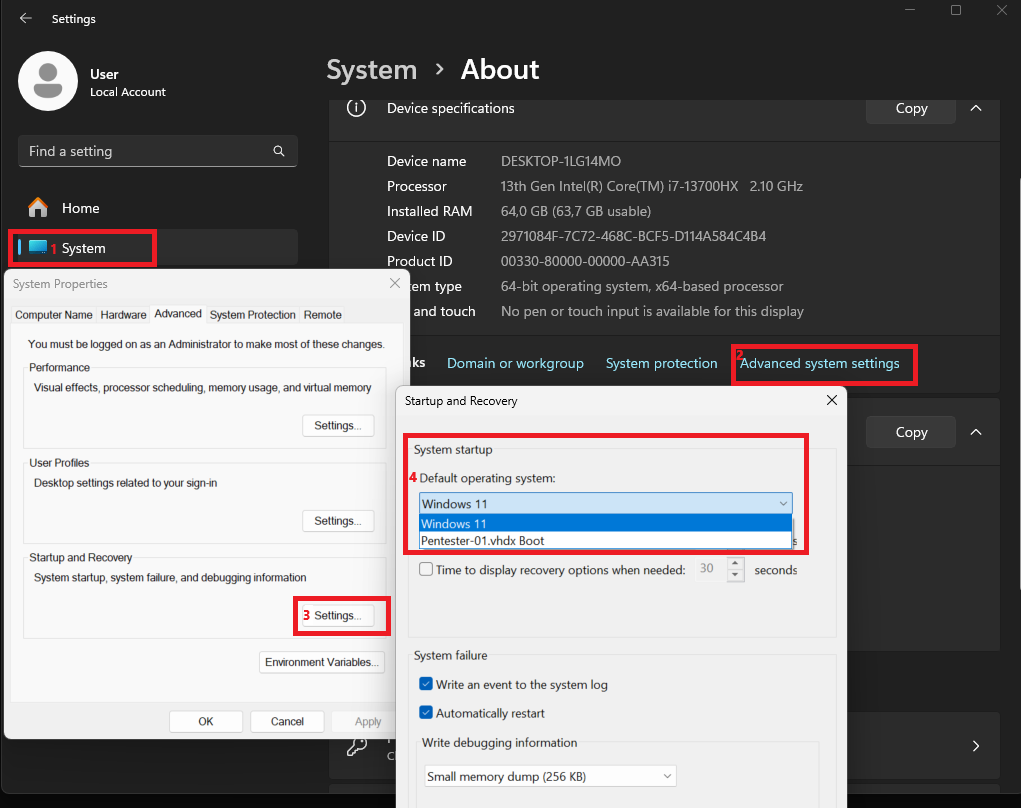
3. Create Boot Sector
Interesting resource for Microsoft activation scripts

Optional: Delete a boot entry in BCD
You have already an VHDX file - NOT TESTED YET!!
Last updated